With all of the traveling I’ve been doing for work recently, I haven’t had much time to write about some of the other things we’ve done to the house since we’ve moved in. If you remember my earlier post entitled Peeling Back The Layers, you’ll recall that the whole first floor had wall-to-wall carpeting and lots of wood paneling, and the dining room was no exception.
The stairs that lead to the second floor, land in the dining room and what’s weird about the bottom of the staircase is that there was a door (above right) that closed off access to the stairs, which I assume was helpful in the old days to keep the heat from escaping to the upstairs.
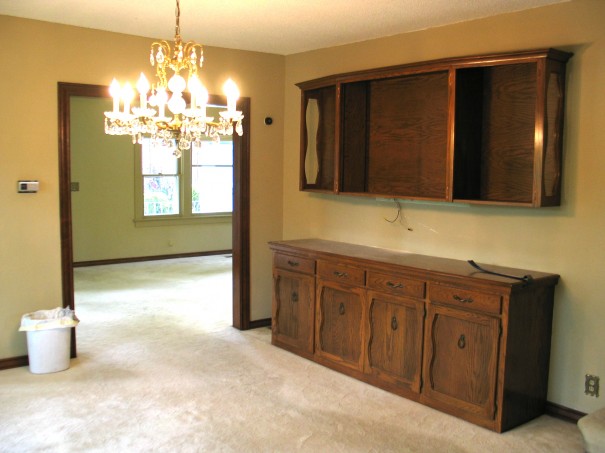
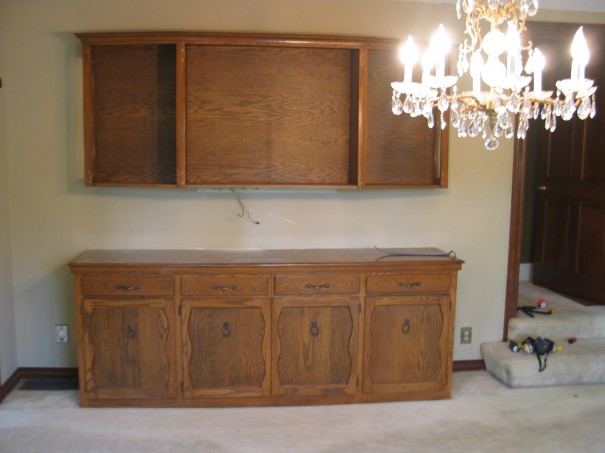
Also on that wall was a massive hutch with a lower part on the floor and an upper part that hung on the wall above it. We could tell from its plywood construction and general ugliness that it clearly wasn’t original to the house and we were anxious to make it go bye-bye.
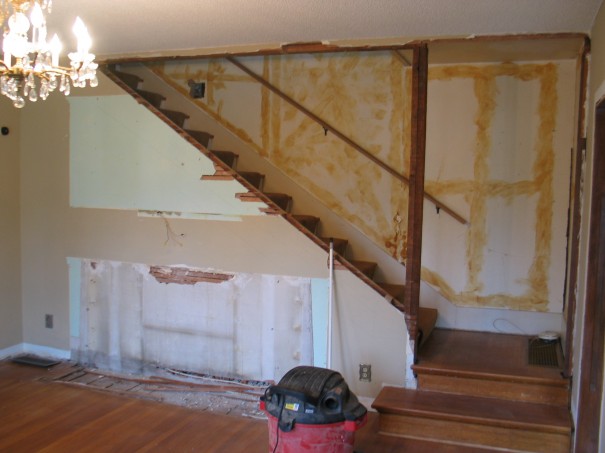
When we first toured the house, we envisioned tearing out that hideous hutch and opening up the wall to expose the stairway behind it. The plan was to remove half of the wall along the line of the staircase (see below) and build a railing with balusters and a beefy antique salvaged newel post anchoring the bottom. After a little structural research (to confirm that it was not a load-bearing wall), that’s exactly what we did.

The upper hutch was a bear to get down. We assumed it was either nailed or screwed into the studs through the wall, but because the inner back wall of the hutch had been covered with another layer of thin plywood, we couldn’t find the screws/nails. We soon gave up on figuring out where the screws/nails were and tried to just pry it off the wall. Slowly, it started to move! But we soon realized that if we just kept prying it off, it would eventually just fall off the wall and either land on us or the floor. So we put a milk crate on top of the lower hutch on either end so when it did fall off, it only fell a few inches and landed on to the crates and not anything else.
With the upper hutch now down, we moved on to the lower hutch. Fortunately, with just a handful of nails securing it to the wall, it was much easier to remove. We simply pried it away from the wall, then lifted it up and out of the room. This hutch was definitely not our style, but it may work for someone else in their house.
Here in Portland, there is a great non-profit organization called The Rebuilding Center that will come and haul away (for free!) your still-useable architectural and construction materials to be re-sold and/or re-purposed at their sustainable salvage facility. Every bit of construction debris that we can keep out of the landfill is helping to make the earth a better place, so I always make every effort to re-use or recycle everything I can. If you’re not in Portland, seek out your local Habitat for Humanity ReStore or check out this list of architectural salvage yards across the country and see if they offer a similar service.
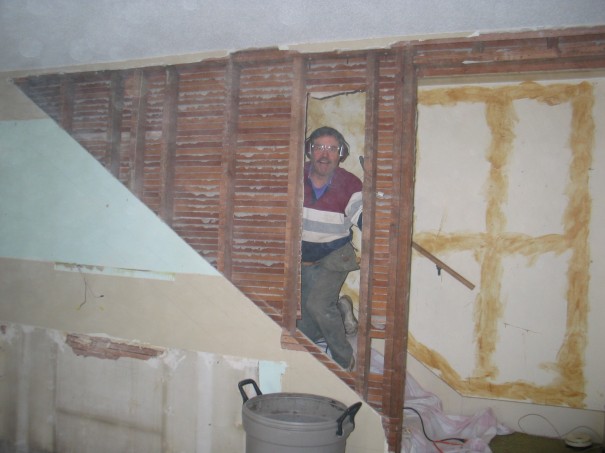
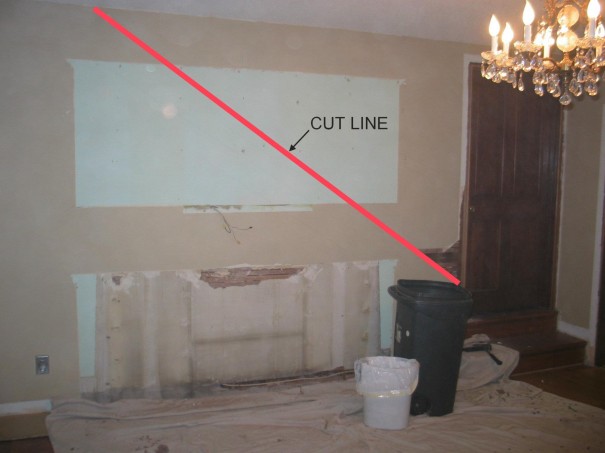
For the wall removal, I enlisted the help of my father-in-law, Craig (pictured above), who is a veteran of countless restoration projects of his own, and we quickly got to work. First we laid out our cut line (see above) and scored the wall wth a circular saw, then used a hammer to break up the lathe-and-plaster wall above our cut which exposed the studs.
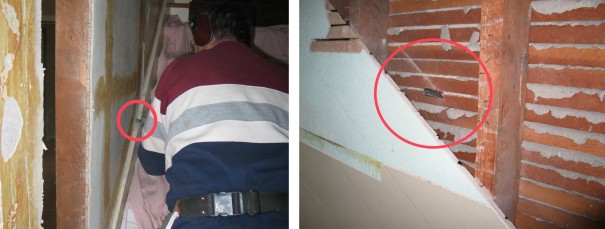
On the stairs side of the wall, we used a reciprocating saw (above) to cut through the wall, and again banged out the lathe-and-plaster with a hammer.
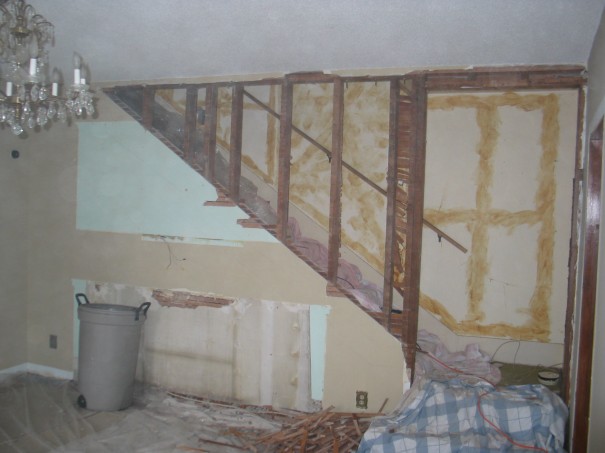
With all the lathe-and-plaster removed, we used the reciprocating saw to cut the studs. I left the doubled-up 2×4’s there for now because I wasn’t sure how long it needed to be to support the yet-to-be-found newel post.
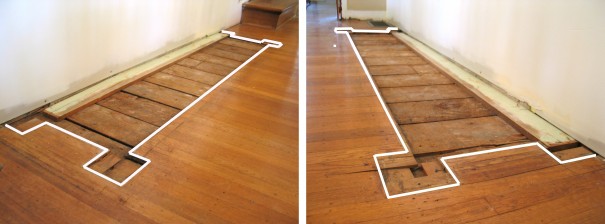
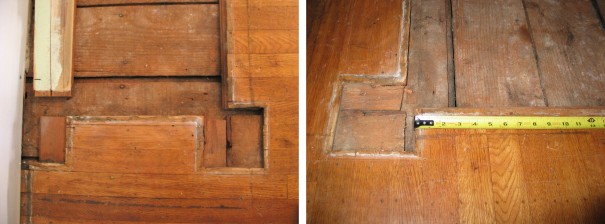
With the hutch finally gone, a new mystery emerged. On the floor underneath the lower hutch, the footprint of the original sideboard was revealed – apparently when the hardwood floors were originally installed, they were laid right around it! I’ve highlighted the outline in the photos below. There were definitely large beefy blocks on each corner, and based on the ghost lines on the wall itself, we knew that the sides were tapered towards the top, but beyond that it was anyone’s guess. Now we had some clues as to what direction to go in for either finding something similar or commissioning a new piece to be made.
Stay tuned for my follow up post, The Ugly Hutch and The Beautiful Stairway That Hid Behind It: Part II to find out how we solved “the mystery of the footprint” and see what the salvaged newel post and railing I scored look like, as well as the new craftsman sideboard we had made.
Coming soon…!


1 comment
Ally says:
Jan 11, 2016
nicely done! but how do you decide where the cut line goes? I am looking to expose stairwell in 100 year old farmhouse with same plaster & lathe