In my previous post, The Ugly Hutch and The Beautiful Stairway That Hid Behind It: Part I, I told you how we removed the existing big ugly hutch and cut part of the wall to expose the staircase behind it.
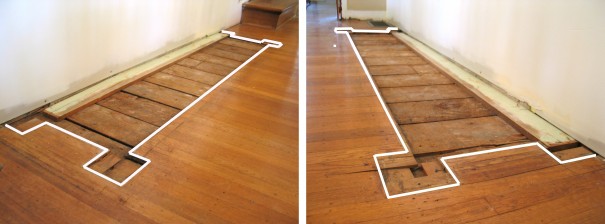
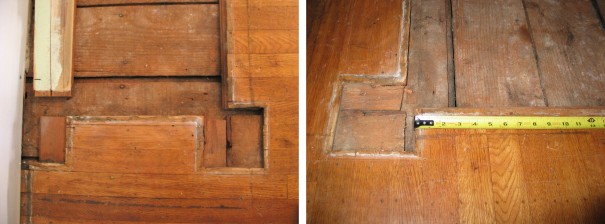
With the hutch and wall now gone, a new mystery emerged. On the floor underneath the lower hutch, the footprint of the original sideboard was revealed – apparently when the hardwood floors were originally installed, they were laid right around it! I’ve highlighted the outline in the photos above. There were definitely large beefy blocks on each corner, and based on the ghost lines on the wall itself, we knew that the sides were tapered towards the top, but beyond that it was anyone’s guess. Now we had some clues as to what direction to go in for either finding something similar or commissioning a new piece to be made. We kicked around some ideas but for the most part we were playing a guessing game, until…
One day after we had removed the old hutch, our next door neighbors (that we hadn’t officially met yet) stopped by to introduce themselves and I showed them our progress on the wall and the newly exposed footprint on the floor. Jeff quickly said, “well, if you want to see what your original sideboard probably looked like, you should come over and see our’s.” Wait, what? We were flummoxed, so we immediately went next door to check it out and there it was!! (see above and below)
AMAZING!! It had everything – the blocky corners, the tapered sides, and even the location of the shelving in the center section were all very similar to the ghost lines on our wall. What was even more interesting was that the dimensions of it pretty much matched our footprint exactly! We have a sneaking suspicion that when our original piece was removed and replaced with that awful hutch monstrosity, it may have been re-installed in our neighbor’s house.
Now that we pretty much had a blueprint for re-creating our original sideboard, we abandoned the idea of trying to find something that was similar to the original and decided on commissioning a new piece to be built that was a perfect match.
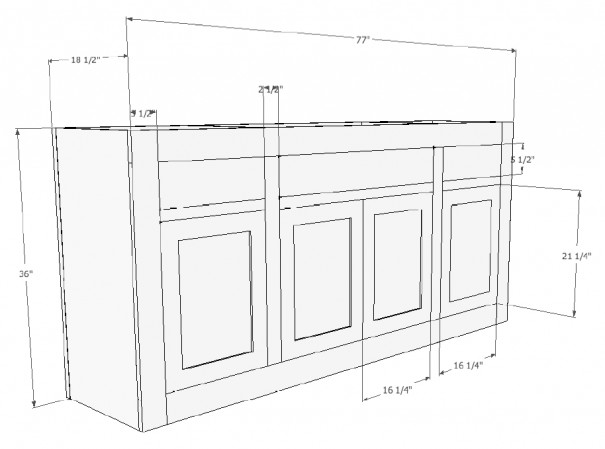
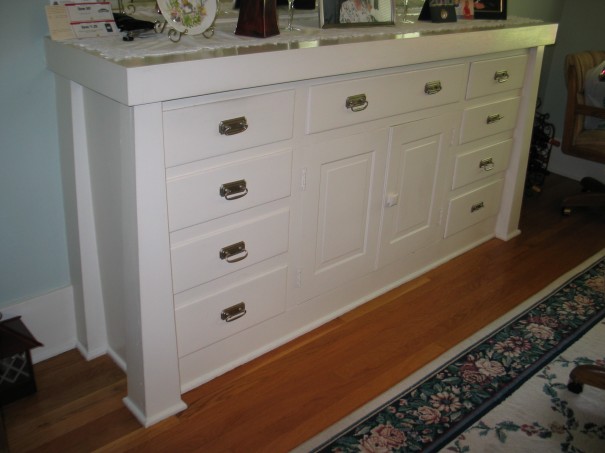
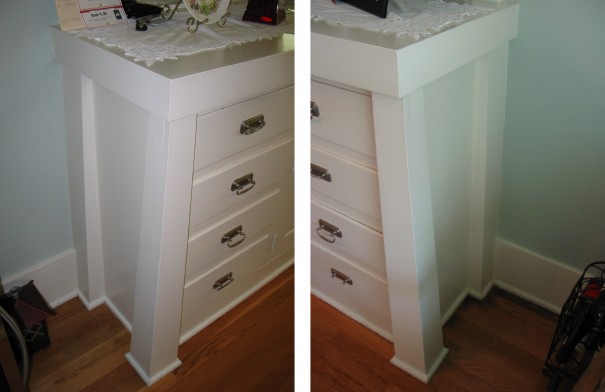
To build our custom sideboard, I called upon George Ramos, a tremendously gifted local Portland cabinet maker and craftsman, who owns George Ramos Woodworking. George came to the house to take some measurements of the footprint on the floor, then we went next door to take a look at my neighbor’s piece and get some more details for the project. We decided to go with all cabinets on the bottom (instead of cabinets in the middle and drawers on the end) because we didn’t feel that we needed as many drawers as my neighbors have on their’s – the result was the design above (the tapered corner blocks and top aren’t shown in this sketch).
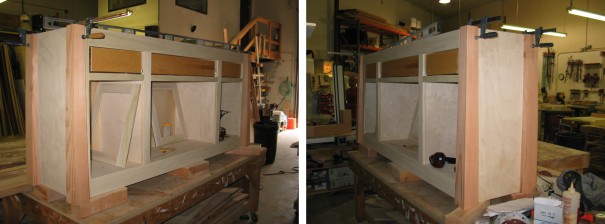
George went right to work and was very patient with us as we tweaked a few things along the way to ensure the new piece covered the original footprint as closely as possible (thanks again, George!). Before we knew it, our new/old sideboard had been reborn!
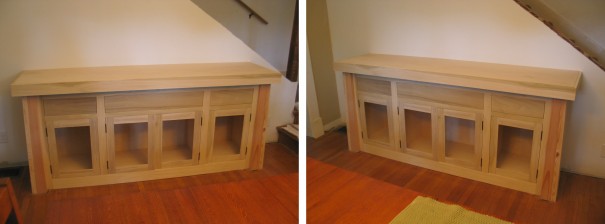
The sideboard is mostly made of poplar and will ultimately be painted (more on that later). My mother-in-law, Reisha, made us some amazing wavy leaded glass inserts for the windows on the cabinet doors that look tremendous and will be installed after we paint it.
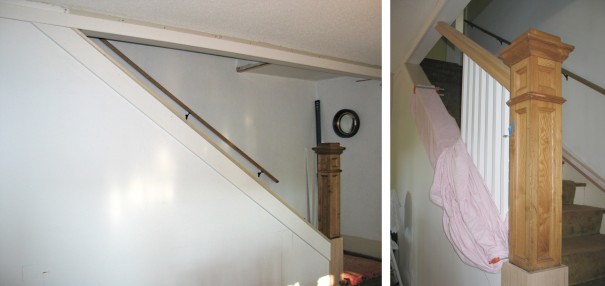
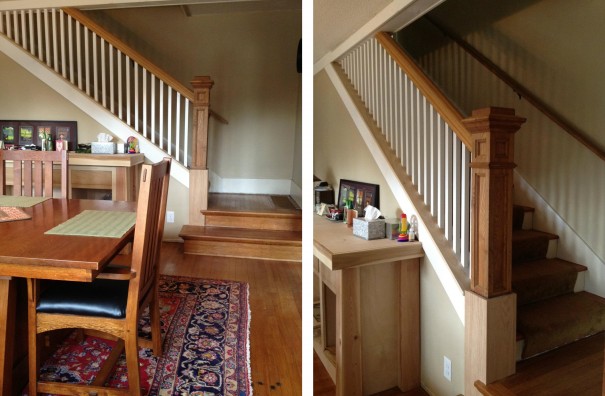
With the mystery of the footprint solved, and the new sideboard built, I could now move on to trimming out the cut-in-half wall and building the stair railing. I had been scouring the local salvage yards for a while looking for a legitimate antique newel post and railing. I found a 7 foot long oak railing at Aurora Mills Architectural Salvage in Aurora, Oregon for (only!) $40 that was super thick and had a perfect ergonomic profile to it.
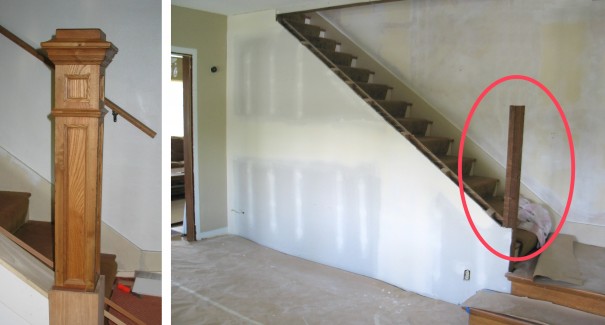
I found this handsome antique oak newel post (above left) at another architectural salvage yard in Portland that had recessed panels, a thick square cap on top, and a nice lustrous patina. The newel post was hollow, so I cut the doubled-up 2×4 that had been part of the wall (above right) to the appropriate height, slipped my newly-acquired newel post over it, and secured it in place with a few screws. This gave me an extremely solid anchor to attach the railing to.
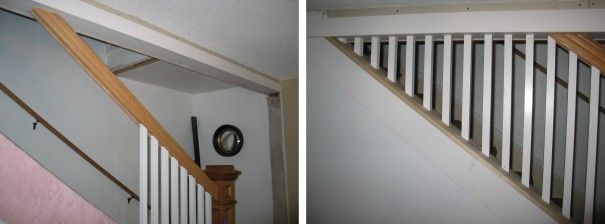
With the newel post now installed, I trimmed out the skirt board and cap for the cut wall and wrapped the upper part of the wall (above left) in 1×4 stock. Cutting the length and the angles on the ends of the railing was tricky, but once it was screwed to the post, it was very stout and solid as a rock.
Taking my cues from the railing upstairs, I went with 1.75 inch square ballusters spaced 2.5 inches apart. The angles on the ends of the ballusters were all the same, and the lengths were the same until I reached the upper part where the space tapered down.
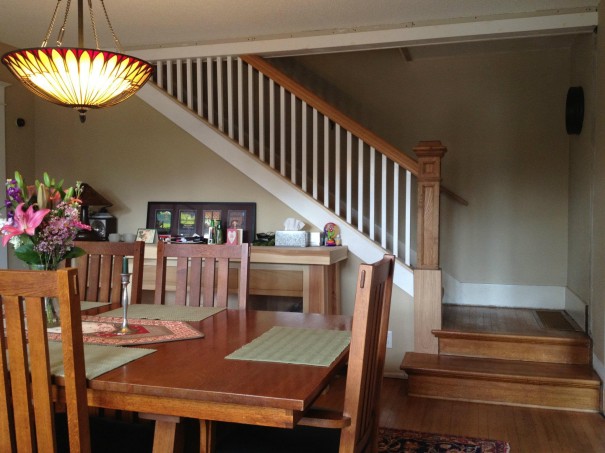
I finished the railing with an oil & urethane satin finish that very closely matches the original finish on the newel post. The trim and ballusters will all be painted some shade of off-white, but with our 11 month old daughter in the house, we’re going to wait until this summer to paint so we can properly ventilate (even though we’ll use Low V.O.C. paint).
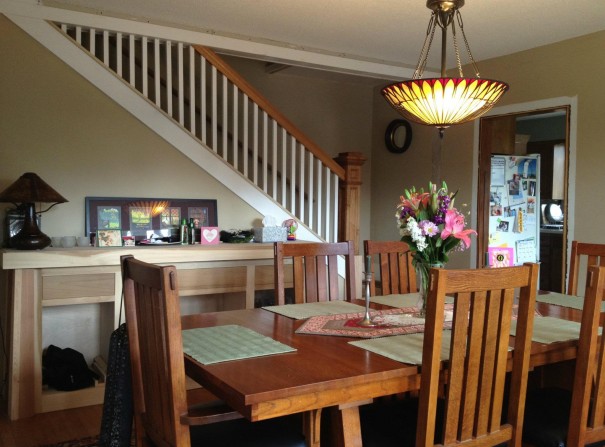
Here is what the dining room wall/sideboard/railing presently looks like. I still have to do some minor touch-up carpentry work, and I’ll write a new post with updated pictures after we finish painting and install the leaded glass later this year. I’m absolutely thrilled with how it turned out and there’s no greater satisfaction than doing it (mostly) yourself.
I’d love to get some feedback from fellow bungalow enthusiasts, so leave me a comment below. WHAT DO YOU THINK ?
If you’ve rebuilt a stair railing or used some salvaged architectural items on a project, I’d love to see pictures. Please feel free to contact me here.
Hope to hear from you soon!


2 comments
Rebecca Hernandez says:
Dec 26, 2013
It’s perfect!! This is exactly what I want to do to my dining room wall that currently hides the staircase in our 1940’s home. I just completed a “secret room” upstairs with a bookcase door….when it’s closed, you don’t know there’s a room behind there. This will be my next project!! Nice work!!
Chris says:
Aug 14, 2014
My living room wall hides a staircase just like this. How much more or less would a job like this cost if done by a contractor? Hope the finish product is as nice as yours. Nice job!